← Otto User GuideTiling
On a tiling workspace, every window gets its own cell: side by side, nothing overlapping, no wasted space. You shape the layout by splitting cells, moving windows between them and dragging the boundaries. Otto rearranges the windows for you as they open and close.
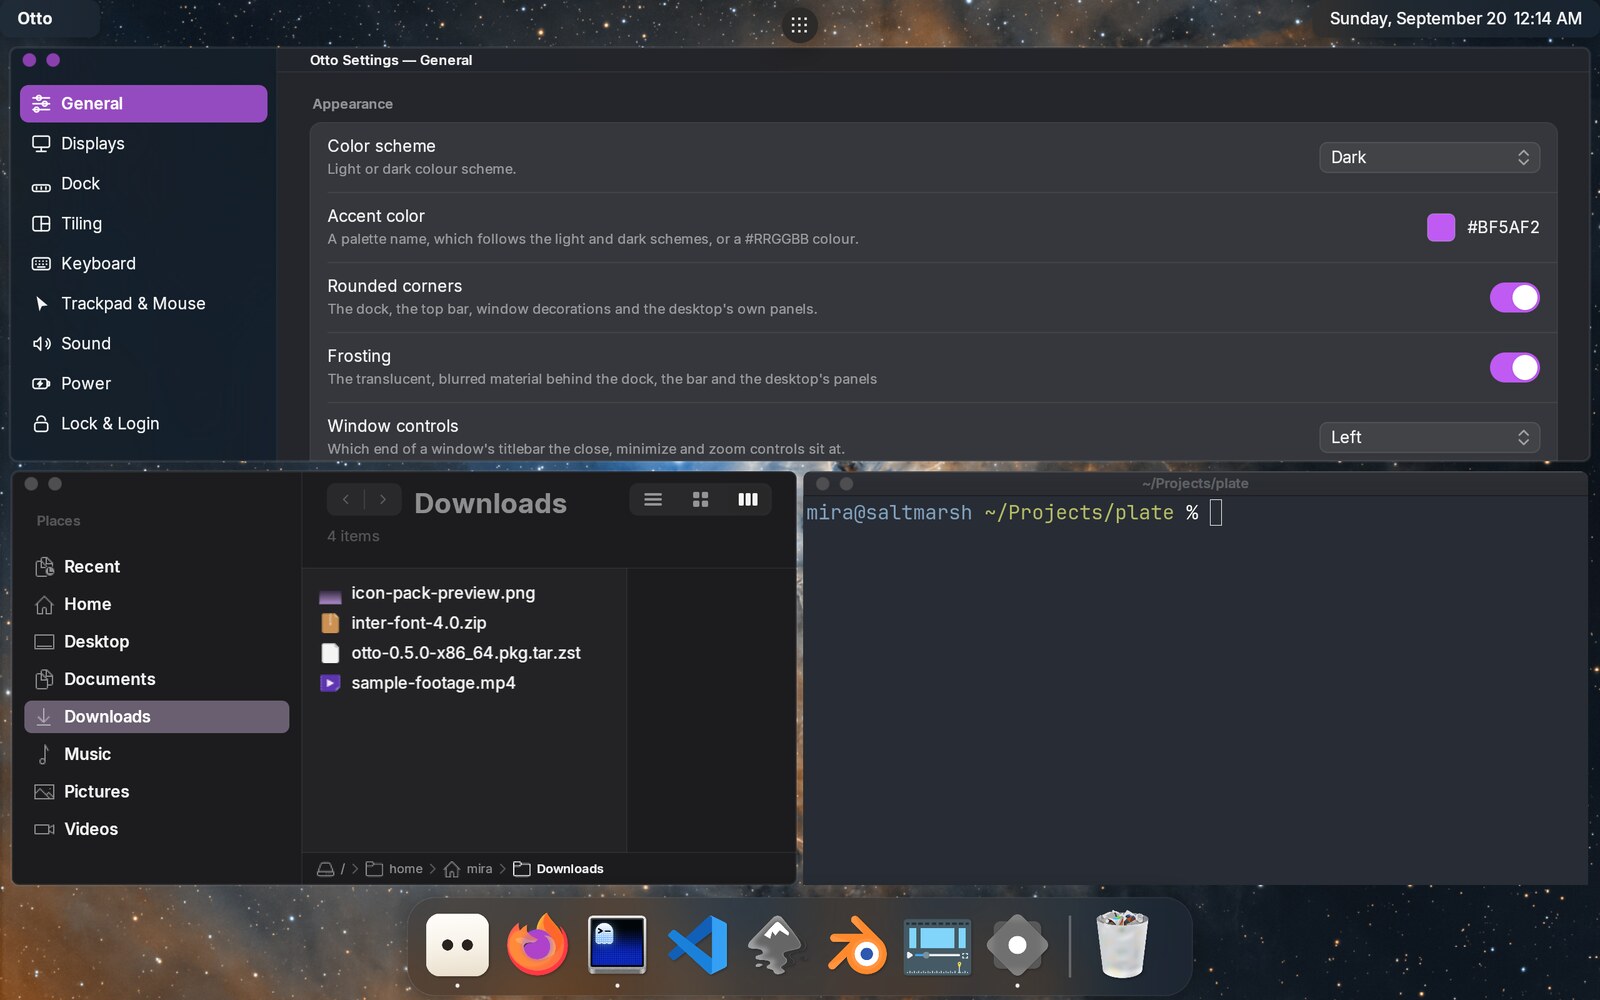
Tiling is a mode of one workspace on one monitor. Otto stacks windows by default, and you can switch any workspace between stacking and tiling whenever you like, as often as you like: every other workspace keeps the mode it is in. So a tiled workspace sits one swipe away from your stacking ones, and you move between them the usual way. Switching back to stacking puts each window on the size and position it had before it was tiled.
If you know i3 or sway, the model is the same: a tree of splits, the same keyboard actions, and the same command language for scripts.
Early version. You can already use tiling day to day with the keyboard, the pointer or a script. A few things are still missing; they are listed at the end of this page.
Turning it on
There are three ways to turn tiling on or off for a workspace:
A shortcut. Bind
TilingToggleto a key; see Setting up the keys. None of the tiling actions has a key until you give it one.A script. Run
otto-msg tiling toggle, ortiling enableandtiling disable. See Scripting Otto.The config file. Add
tiling = trueto the workspace’s record:[workspaces.entries."eDP-1:0"] tiling = trueThe key is
"<monitor>:<position>", with positions counting from 0. Otto writes this record for you whenever you toggle a workspace, so a tiled workspace is still tiled after a restart. See Workspaces.
When you turn tiling on, the windows already on the workspace move into cells, starting with the one you used most recently. When you turn it off, each window goes back to the size and position it had before.
Which windows tile
A window joins the layout when it is an ordinary, resizable application window. These float above the tiles instead:
- dialogs, and any other window that belongs to a parent window — including the file chooser an application opens through the desktop portal;
- windows that say they are a modal dialog, even without naming a parent;
- windows with a fixed size;
- X11 applications running through XWayland, for now.
The tiles lay themselves out as if a floating window weren’t there, and a floating window always draws above them: focusing a tile never covers it up.
Floating a window yourself
FloatingToggle, or otto-msg floating toggle, takes the focused window out
of the layout: it goes back to the size and position it had before it was
tiled. A window that was opened straight into the layout instead gets a
sensible fraction of the workspace, centred where its cell was. The remaining
tiles close up around it. The same action on a floating window puts it back in,
beside whichever tile has focus. floating enable and floating disable say
which way you mean.
FocusModeToggle, or otto-msg focus mode_toggle, moves focus between the
two layers: from a tile to the floating window you used last, and back again.
focus floating and focus tiling name one of them outright.
How windows fill the screen
The first window takes the whole workspace. Each new window splits the focused window’s cell in half:
- If the cell is wider than it is tall, the new window goes beside it.
- If the cell is taller than it is wide, the new window goes below it.
Opening windows one after another therefore makes an even spiral, rather than ever-thinner strips along one side. Only the focused cell is split; the other windows stay where they are.
To choose the direction for the next window yourself, use SplitHorizontal or
SplitVertical before opening it. Press the same one again to cancel.
When a window closes or is minimized, its neighbours share out the space it leaves.
Everything is stored as proportions, not pixel sizes. If the dock changes size, a panel appears or you change the display scale, the layout keeps its shape and fits the new space.
From the keyboard
| Action | What it does |
|---|---|
TilingToggle | Turn tiling on or off for this workspace |
FocusLeft FocusRight FocusUp FocusDown | Focus the neighbouring tile. Focus doesn’t wrap around |
MoveContainerLeft …Right …Up …Down | Move the focused window that way. It swaps with its neighbour, or leaves its group if there is nothing to swap with |
SplitHorizontal / SplitVertical | Choose whether the next window opens beside or below the focused cell |
ResizeGrowWidth / ResizeShrinkWidth | Make the focused cell wider or narrower, taking space from its neighbour |
ResizeGrowHeight / ResizeShrinkHeight | Make it taller or shorter |
EqualizeContainer | Give every window in the focused group the same share |
FloatingToggle | Float the focused tile, or put a floating window back into the layout |
FocusModeToggle | Move focus between the floating windows and the tiled ones |
On a tiling workspace, the half-screen shortcuts TileWindowLeft and
TileWindowRight move focus left and right instead of snapping windows.
Each resize moves the boundary by resize_step, which is 5% of the space by
default. If the focused window has no neighbour in the direction you ask for,
the resize acts on the nearest enclosing group that does, so a resize always
changes something when more than one window is tiled.
Setting up the keys
otto_config.example.toml includes a commented-out block of i3-style bindings.
Copy it into the [keyboard_shortcuts] section of your config and change
whatever you like:
[keyboard_shortcuts]
"Logo+t" = "TilingToggle"
"Logo+h" = "FocusLeft"
"Logo+j" = "FocusDown"
"Logo+k" = "FocusUp"
"Logo+l" = "FocusRight"
"Logo+Shift+h" = "MoveContainerLeft"
"Logo+Shift+j" = "MoveContainerDown"
"Logo+Shift+k" = "MoveContainerUp"
"Logo+Shift+l" = "MoveContainerRight"
"Logo+b" = "SplitHorizontal"
"Logo+v" = "SplitVertical"
"Logo+r" = "ResizeGrowWidth"
"Logo+Shift+r" = "ResizeShrinkWidth"
"Logo+Ctrl+r" = "ResizeGrowHeight"
"Logo+Ctrl+Shift+r" = "ResizeShrinkHeight"
"Logo+e" = "EqualizeContainer"
"Logo+Shift+space" = "FloatingToggle"
"Logo+space" = "FocusModeToggle"
Shortcuts are read when Otto starts, so restart the session after changing them.
If [input] sets xkb_options = ["altwin:ctrl_win"] or
mac_style_modifiers = true, the Super key sends Control, so Logo+… bindings
never fire. Use Ctrl+Alt+h and so on instead.
With the pointer
On a tiling workspace, dragging changes the layout, not a single window’s size and position.
Drag a tile by its titlebar and it lifts out of the layout. It shrinks to follow the pointer, and the other tiles close the gap behind it. A translucent pane shows where it will land:
- Over the left or right half of a wide tile, or the top or bottom half of a tall one, it goes into that half and splits the tile.
- Over the middle of a tile, the two windows swap places. Nothing else moves.
- Over nothing, such as an empty workspace, it goes against the nearest outer edge of the layout.
Release to drop it. Press Escape during the drag to put it back where it
was. The screen-edge snap zones are not used on a tiling workspace.
Drag the edge between two tiles to change how they share the space. Only
those two tiles change. Drag a corner where tiles meet to move both boundaries
at once. The boundary snaps to halves, thirds and quarters; hold Shift to
move it freely. A tile is never made smaller than its application allows.
The outer edge of the layout, against the edge of the screen, can’t be dragged. Applications can’t resize a tile themselves: a tile is always exactly the size of its cell.
Gaps
Tiles are separated by an inner gap and kept away from the screen edges by
an outer gap. The outer gap is measured from the usable area: the screen
minus the dock, the top bar and any panels. With smart_gaps on, a workspace
with a single window has no gaps, so that window isn’t inset for no reason.
The values under [tiling] are the defaults. Each workspace can have its own:
otto-msg gaps inner 0            # this workspace only, kept across restarts
otto-msg gaps outer 16 current   # same thing, written out in full
otto-msg gaps inner 8 all        # the default for every workspace, this session
A per-workspace gap is saved in that workspace’s record as inner_gap and
outer_gap. The gap sliders in Settings change the defaults, and they clear
all per-workspace gaps, so every workspace ends up with the new values.
Title bars on tiles
decoration sets how much of a title bar a tiled window keeps:
| Value | What a tile gets |
|---|---|
"minimal" (default) | A slim bar, one line of text high, with the title and smaller window controls. It is still the handle for dragging the tile |
"normal" | The same title bar the window has when floating. Only its shadow is removed, and its outer corners are squared |
"none" | No bar at all. The focused tile has an accent-coloured border and the others a thin neutral one. Move tiles with the keyboard |
Tiles have no drop shadows, because nothing overlaps them. Applications that
draw their own title bars are told which edges touch another tile, so they can
square those corners. Otto’s own applications also follow this setting: their
title bars shrink under minimal and disappear under none.
Settings
The Tiling pane in Settings has every option below. Changes apply right away. You can also set them in the config file:
[tiling]
decoration = "minimal"   # "normal", "minimal" or "none"
inner_gap = 8            # logical pixels between tiles
outer_gap = 8            # logical pixels around the tiles
smart_gaps = true        # no gaps when a workspace has one window
resize_step = 0.05       # fraction moved by one keyboard resize

layout_duration = 0.3    # a window opening, closing, moving or resizing
layout_bounce = 0.0
mode_duration = 0.4      # turning tiling on or off
mode_bounce = 0.1
Durations are in seconds. Set one to 0 to skip that animation entirely:
windows jump straight into place. Bounce sets how far the motion overshoots
before settling, where 0 means no overshoot.
Scripts and status bars
otto-msg accepts i3’s commands (focus left, split v,
move container to workspace 3, resize grow width 10 ppt) and prints the
window tree in i3’s JSON format. Existing i3 and sway scripts and status bars
usually need only the program name changed. See
Scripting Otto.
Unlike i3, Otto never removes a workspace when its last window closes. Otto workspaces have names and a fixed order, so they stay until you remove them.
Not there yet
- Dropping a tile outside the layout puts it back at an edge rather than leaving it floating where you let go.
- A floating item in the window menu. Use
FloatingToggleorotto-msg. - Tabbed and stacked groups.
layout tabbedandlayout stackingreport that they aren’t supported yet. - Monocle. Maximizing a window doesn’t yet hide the other tiles.
- X11 applications float instead of tiling.
- Moving a window to another monitor by command.
focus parentandfocus childare available fromotto-msgbut have no keyboard action yet. - Window rules that always float, or always tile, a particular application.
- A tiling option in the workspace menu. For now, use a shortcut,
otto-msgor the config file.